

If you’ve noticed a water stain creeping across your ceiling near the fireplace, it’s easy to assume you have a roof leak. But in most Vancouver homes, the real culprit isn’t the shingles at all — it’s the chimney flashing, the thin metal seal where your chimney meets the roofline. When flashing cracks, rusts, or pulls away from the masonry, rain finds a direct path into your attic, walls, and ceilings, even if the rest of your roof is in perfect condition.
This guide walks through the exact signs that point to a flashing problem, how it differs from a true roof leak, what causes it to fail in our coastal climate, and what chimney flashing repair typically involves.
What Is Chimney Flashing?
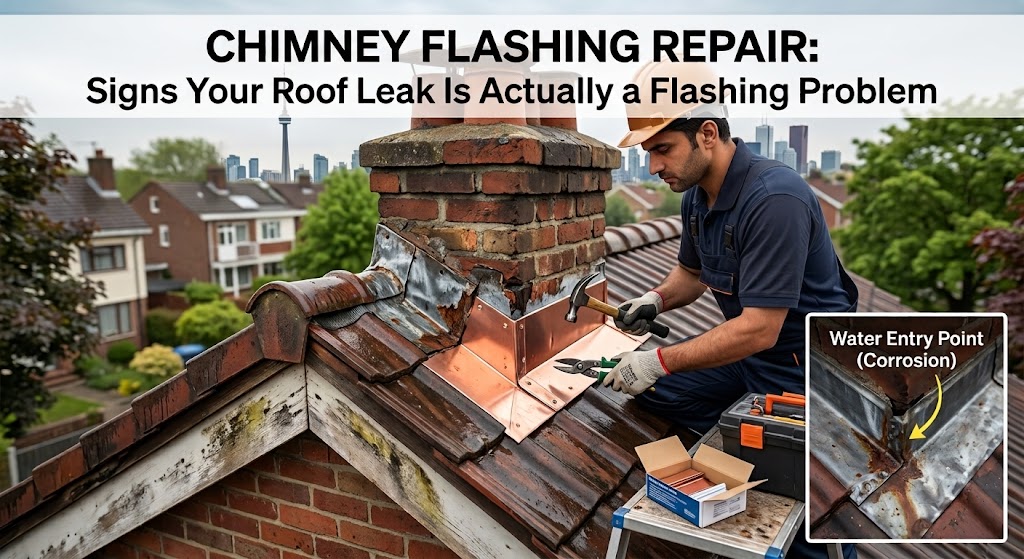
Chimney flashing is a system of overlapping metal pieces installed where your chimney penetrates the roof. Its only job is to keep water out of that joint. A properly built system includes:
- Base flashing — the bottom layer that sits against the chimney at the lowest point of the roof slope
- Step flashing — L-shaped metal pieces woven between shingle courses up the sides of the chimney
- Counter-flashing (cap flashing) — the top layer embedded into the mortar joints of the chimney, overlapping the step flashing to shed water outward
- Cricket (saddle) — a small sloped structure built behind wider chimneys to divert water around, rather than into, the joint
When any one of these pieces separates, corrodes, or was installed incorrectly, water has a way in. Our chimney counter-flashing repair service exists specifically because this is the layer that fails first — it’s mortared into the brick and takes the brunt of expansion, contraction, and freeze-thaw movement.
Why Vancouver Homes Are Especially Prone to Flashing Leaks
Metro Vancouver’s climate is uniquely hard on flashing. Long, wet winters keep masonry saturated for weeks at a time, and repeated freeze-thaw cycles force tiny cracks in mortar joints to widen year after year. We’ve broken down exactly how this happens in how Vancouver’s rainy climate damages chimneys faster — but the short version is that homes in Burnaby, Surrey, Coquitlam, and North Vancouver see flashing failures years earlier than drier climates would.
7 Signs Your Roof Leak Is Actually a Flashing Problem
If you’re seeing any of the following, the chimney flashing — not the roof itself — is the most likely source.
- Water stains directly below or beside the chimney. A brown or yellow stain that starts near the chimney chase and spreads outward, rather than appearing randomly across the ceiling, almost always traces back to the flashing joint.
- Rust streaks on the brick. Reddish-brown “tracks” running down the masonry are caused by water running over corroded metal flashing before it seeps into the wall.
- Visible gaps or lifted metal at the chimney base. From the ground with binoculars, look for flashing that’s pulled away from the brick, bent upward, or missing sections after a windstorm.
- Dripping sounds during or after rain. If you hear water inside the flue or wall cavity specifically when it rains — not a constant drip — it’s a strong sign water is entering at the flashing and running down framing members.
- Musty odor near the fireplace or upper floor. Trapped moisture behind drywall often announces itself with smell before it ever shows a visible stain.
- Damp insulation or dark, discolored wood in the attic near the chimney. This is usually the clearest confirmation, since it shows exactly where water is entering the structure.
- Heavy, uneven caulk or sealant around the chimney base. This usually means a previous owner or contractor patched a flashing leak with caulk instead of correcting it — a temporary fix that tends to fail again within a season or two.
Flashing Leak vs. Other Roof Leaks: How to Tell the Difference
Not every leak near a chimney comes from flashing. Here’s how to distinguish it from other common sources:
| Symptom | Most Likely Source |
| Stain directly around or below the chimney, follows rainstorms | Chimney flashing |
| Stain in the middle of a room, far from any penetration | Damaged shingles or underlayment |
| Leak near a skylight or exhaust vent | Vent boot or skylight flashing |
| Leak in a roof valley during heavy rain | Valley flashing or debris blockage |
| Rust tracks on brick + dripping in the flue | Chimney flashing (confirmed) |
| Ice buildup at the roof edge with leak in winter only | Ice damming, not flashing |
If your symptoms line up with the left column above, the fix is a chimney repair or flashing-specific service rather than a full roof repair — which can save you from paying for work you don’t actually need.
Where to Look: Ground-Level vs. Attic-Level Diagnosis
From the ground: Use binoculars to scan the base of the chimney for lifted or separated metal, cracked mortar joints, and rust discoloration. Never climb onto a wet or steep roof yourself.
In the attic: Check directly around the chimney chase for damp insulation, dark or soft wood decking, and rust on nearby nails — nails “sweating” moisture is an early sign of condensation building behind failed flashing, often before any ceiling stain appears.
If both checks point the same direction, it’s time to book a professional chimney inspection rather than guess. Our full walkthrough of what to check before the wet season hits is in our chimney inspection checklist for Vancouver homeowners.
What Causes Chimney Flashing to Fail?
- Age and material fatigue — most flashing lasts 15–20 years before the metal itself thins, rusts, and loses its ability to shed water
- Storm and wind damage — high winds work nails loose and lift the edges of step flashing just enough to let water track underneath
- Poor original installation — flashing that wasn’t properly woven into shingle courses, or wasn’t mortared into a cut reglet along the brick, tends to fail within just a few years
- Freeze-thaw cycling — Vancouver’s wet winters push water into mortar joints, where it freezes, expands, and gradually widens the joints holding counter-flashing in place
- Incompatible materials — some metals corrode faster when in constant contact with wet mortar, which is why material choice matters as much as installation quality
- Debris buildup — leaves and moss trap moisture against the flashing seams, accelerating corrosion in areas with overhanging trees
We cover this in more depth in chimney leaking causes and repair in Vancouver, including which materials hold up best in our climate.
How Professional Flashing Repair Is Done
A proper repair goes well beyond applying fresh caulk. A qualified mason or roofer will typically:
- Inspect the full system — checking step flashing, counter-flashing, the cricket, and surrounding mortar joints, not just the section where the stain appeared
- Remove the failed flashing — pulling back the affected shingles and lifting out the corroded or separated metal
- Cut a new reglet — grinding a clean channel into the mortar joint so the counter-flashing can be embedded properly, rather than just caulked on top
- Install new step and counter-flashing — using corrosion-resistant metal suited to the local climate, woven correctly with each shingle course
- Reseal and test — applying appropriate sealant at the joints and testing the repair with a controlled water test before considering the job complete
This is also the point where our team checks for related issues — a deteriorating chimney crown, cracked mortar, or a missing cricket — since these are frequently discovered alongside a flashing failure and are far cheaper to fix in the same visit than as a separate call-back.
DIY Inspection vs. Calling a Professional
A homeowner can safely do the ground-level and attic checks above. However, flashing repair is not a good DIY project — it requires removing shingles, weaving new step flashing correctly, and cutting fresh reglets into mortar joints for counter-flashing. Improper DIY patches (especially caulk-only fixes) commonly trap moisture and accelerate rot rather than solve the problem.
If you’ve confirmed any of the signs that your Vancouver chimney needs immediate repairs, the safest next step is a professional assessment rather than a ladder and a caulk gun.
How Much Does Chimney Flashing Repair Cost?
Costs vary depending on whether the fix is a localized flashing repair or a full replacement, and whether masonry work (such as new reglets or crown repair) is needed alongside it. For a full breakdown by scope and season, see our chimney repair cost pricing guide for Vancouver.
Best Time of Year to Fix Flashing in Vancouver
Late summer and early fall — before the wet season sets in — is the ideal window for flashing repair, since it lets sealants and mortar cure in dry conditions before winter rain arrives. We break this down further in the best time of year for chimney repair in Vancouver, BC. If you’re already past a storm and dealing with an active leak, our guide to emergency chimney repair after a storm covers what to do in the meantime.
Repair or Full Replacement?
Minor flashing issues — a lifted section, a cracked seal, isolated rust — are usually resolved with a targeted repair. But if the flashing has failed in multiple areas, or the surrounding masonry (crown, mortar joints) is also deteriorating, replacement is often more cost-effective long term. Our guide on chimney repair vs. rebuild explains how to weigh that decision, and if the issue extends to the top of the stack, see our page on chimney crown replacement.
Frequently Asked Questions
Can chimney flashing leak without any visible holes?
Yes. Flashing doesn’t need a hole to leak — a separated seam, a lifted edge, or a failed mortar joint around counter-flashing is enough to let water in, even though the metal itself looks intact.
How long does chimney flashing last?
Properly installed flashing typically lasts 15–20 years, though Vancouver’s wet climate can shorten that lifespan, especially for lower-quality materials or poor original installation.
Does home insurance cover flashing leak damage?
Coverage varies by policy and provider. Sudden storm damage is more commonly covered than gradual deterioration from age or lack of maintenance, so it’s worth confirming details directly with your insurer.
Is a small flashing leak urgent?
Yes. Even a slow leak can rot roof decking and framing over time. Catching it early, before interior damage spreads, is far less costly than waiting.
The Bottom Line
A leak near your chimney is far more likely to be a flashing problem than a failure of your actual roofing shingles. Catching the signs early — water stains that hug the chimney, rust tracks on the brick, damp attic insulation — can save you from a much larger repair bill down the road.
If you’re seeing any of these warning signs in Burnaby, Vancouver, Surrey, Coquitlam, New Westminster, Port Moody, North Vancouver, or Richmond, contact Red Brick Masonry for a professional chimney inspection and flashing repair estimate.