

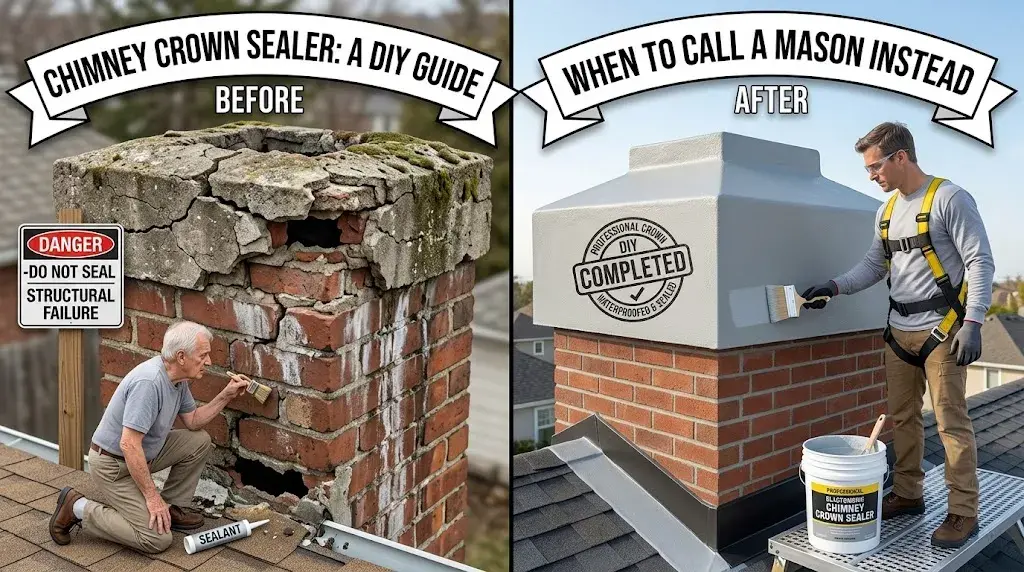
A chimney crown is one of the few parts of a chimney a homeowner can genuinely maintain themselves — sealing hairline cracks with the right chimney sealer is affordable, low-risk, and can add years to a crown’s life if it’s caught early. But it’s also one of the most misunderstood parts of a chimney, frequently confused with the cap or the flashing, which leads homeowners to buy the wrong product or miss a problem that sealer can’t actually fix.
What Is a Chimney Crown, Exactly?
The chimney crown is the concrete or mortar slab that caps the top of the masonry structure, sealing the gap between the outer brick walls and the flue liner. A properly built crown is sloped, extends past the chimney’s edges to form a drip edge, and is made of reinforced concrete rather than plain mortar — which matters, since mortar-only crowns fail far faster.
For the full breakdown of proper crown construction, signs of failure, and what professional replacement involves, see our chimney crown replacement page — this guide focuses specifically on sealing and DIY maintenance rather than repeating that ground.
Crown vs. Cap vs. Flashing: Clearing Up the Confusion
These three terms get mixed up constantly, and it matters, because a problem with one doesn’t mean the others need attention:
- The crown is the concrete slab on top of the masonry structure — what this guide is about.
- The cap is the metal cover on top of the flue itself, keeping rain, debris, and animals out of the chimney opening. See our chimney pots and rain caps page for cap-specific information.
- The flashing is the separate metal seal where the chimney meets the roofline, not on top of the chimney at all. Flashing failures and crown failures cause similar symptoms — water stains near the chimney — but need completely different fixes. Our chimney flashing repair guide explains how to tell them apart.
A common mistake is sealing the crown when the actual leak is coming from failed flashing lower down, or vice versa. If you’re not sure which one is the source, a professional chimney inspection will confirm it before you spend money treating the wrong problem.
When DIY Sealing Makes Sense (and When It Doesn’t)
Crown sealer is appropriate when:
- Cracks are hairline to about 1/4 inch wide
- The crown is otherwise structurally sound — no large missing sections
- There’s no significant spalling or separation from the surrounding masonry
- You’re doing preventative maintenance on a crown that’s still in good shape
Sealer is not a fix for:
- Cracks wider than 1/4 inch or extensive cracking across the surface
- Missing chunks of concrete exposing the flue
- A crown separating from the chimney brick
- A crown that was built flat, with no slope or drip edge — sealer doesn’t fix a design flaw
- A crown that’s mortar-only rather than reinforced concrete
In those cases, sealer at best delays the problem and at worst traps moisture behind a coating that looks fine on the surface while damage continues underneath. Our crown repair vs. replacement guide explains how to tell which situation you’re in.
What You’ll Need
- A brushable elastomeric chimney crown sealer — this is the type of chimney sealer sold at masonry supply stores
- A stiff wire or poly brush
- A 3–4 inch synthetic bristle paint brush
- Fast-setting patching cement or premium siliconized acrylic latex caulk, for cracks wider than 1/4 inch
- Painter’s tape, to protect the vertical brick below the crown edge
- Drop cloths, to protect the roof from spills
- Disposable gloves and safety glasses
How to Seal a Chimney Crown: Step-by-Step
- Check the weather first. Most sealers need surface and air temperatures between 45°F and 95°F, and no rain expected for at least 4 hours after application. Applying in the wrong conditions is the single most common reason DIY sealing fails.
- Inspect before you seal. Look for cracks wider than 1/4 inch, missing sections, or separation between the crown and the brick. If you see any of these, stop — this is a repair or replacement situation, not a sealing one.
- Clean the surface thoroughly. Use a stiff wire or poly brush to remove all loose debris, dirt, moss, and crumbling material. The surface needs to be clean, dry, and structurally sound before sealer will bond properly.
- Fill larger cracks first. Any crack approaching 1/4 inch should be filled with fast-setting patching cement or quality latex caulk before you apply sealer over it — sealer alone isn’t designed to bridge gaps that size.
- Tape the edges. Run painter’s tape along the top course of brick just below the crown’s drip edge, so you get a clean line and don’t coat brick that doesn’t need it.
- Apply the first coat. Using your paint brush, work the sealer into the surface like you’re painting a wall, making sure to press it into any hairline cracks rather than just brushing over them.
- Wait for tack, then apply a second coat. Most sealers need a few minutes to become tacky before a second coat will bond properly — check your specific product’s instructions, since dry times vary.
- Let it cure fully before removing tape or exposing it to weather. Full cure time is typically a few hours, but cover the crown with plastic sheeting if rain is a risk during that window.
Common DIY Sealing Mistakes
- Skipping surface prep. Sealer applied over dirt, moss, or loose material won’t bond and will fail early.
- Applying in the wrong weather. Cold, hot, or wet conditions all compromise how well the coating cures.
- Treating large cracks as sealer-only fixes. Anything over 1/4 inch needs filling first, or ideally, a professional assessment.
- Assuming sealer fixes a design problem. A flat crown with no slope will keep failing no matter how much sealer you apply — the shape itself needs correcting, which means replacement.
- Confusing a crown leak with a flashing leak. Sealing the crown won’t help if the water is actually coming in around the flashing lower down.
How Often Should You Reseal?
Most manufacturers recommend resealing with a chimney sealer every 3-5 years as preventative maintenance, even on a crown showing no visible problems. Pairing this with your annual chimney inspection is the most efficient way to catch developing cracks before they need more than a coat of sealer.
When Sealing Isn’t Enough: Signs You Need a Professional
If you’re seeing any of the following, sealer won’t solve the underlying problem, and it’s worth booking a free crown inspection instead:
- Cracks wider than 1/4 inch, or multiple cracks across the surface
- Spalling or flaking concrete
- Visible separation between the crown and the chimney brick
- Missing chunks exposing the flue
- A flat crown with no slope or overhang
- Water stains inside the home that persist after sealing
A mason can tell you definitively whether you’re looking at a simple repair or a full replacement — for the complete cost breakdown of both options, see our chimney crown replacement page.
Frequently Asked Questions
How long does chimney crown sealer last?
A properly applied sealer typically lasts 3-5 years before needing reapplication, though this varies by product and exposure to weather.
Can chimney crown sealer fix a crack?
Yes, but only for hairline cracks up to about 1/4 inch wide. Larger cracks need to be filled with patching cement or caulk before sealer is applied, and significant cracking usually indicates the crown needs professional repair or replacement instead.
Is chimney crown sealer the same as flashing sealant?
No. Crown sealer coats the concrete slab on top of the chimney; flashing is a separate metal seal where the chimney meets the roof, lower down. They’re different materials solving different problems — see our flashing repair guide for flashing-specific information.
Can I apply chimney crown sealer myself?
Yes, for a crown in generally sound condition with only minor cracking. It’s a reasonably accessible DIY project, though it does require working at chimney height — use proper roof safety precautions or hire a professional if you’re not comfortable on a ladder or roof.
What’s the difference between a brick chimney crown and a concrete one?
The crown itself should always be concrete (or mortar, though that’s less durable) regardless of whether the chimney structure below it is brick, stone, or block. “Brick chimney crown” is sometimes used loosely to mean the crown on a brick chimney, but the crown material itself isn’t brick — it’s a poured or formed concrete cap. For the same reason, there’s no such thing as a dedicated brick chimney sealer — what people usually mean by that term is a standard chimney crown sealer applied to the crown of a brick chimney, since the sealer treats the concrete crown, not the brick itself.
Do I need to seal a brand-new chimney crown?
Newly poured concrete crowns typically don’t need sealer applied immediately — check with your contractor on curing time and their recommendation for when to apply the first coat.
Sealing a healthy crown is one of the few chimney maintenance tasks you can genuinely handle yourself — but it only works if the crown is a good candidate for it. If you’re not sure whether you’re looking at a sealing job or something more serious, get in touch for a free inspection, or see our full chimney crown replacement page for repair and replacement pricing across Metro Vancouver.
This guide covers what a chimney sealer actually does, how it differs from crown repair or replacement, exactly how to apply it yourself, and — just as importantly — how to recognize when a crack has gone past what sealer can handle.