
A chimney may appear sturdy from the outside, but hidden issues such as cracked masonry, moisture intrusion, damaged flue liners, or creosote buildup can develop over time without obvious warning signs. Left unnoticed, these problems can affect fireplace performance, reduce energy efficiency, and even create serious safety risks.
Understanding the chimney inspection process helps homeowners know what to expect when scheduling an inspection and why it plays an essential role in maintaining a safe, efficient, and long-lasting chimney system. Whether you use your fireplace regularly during winter or only occasionally, routine inspections allow professionals to identify small concerns before they develop into expensive structural repairs.
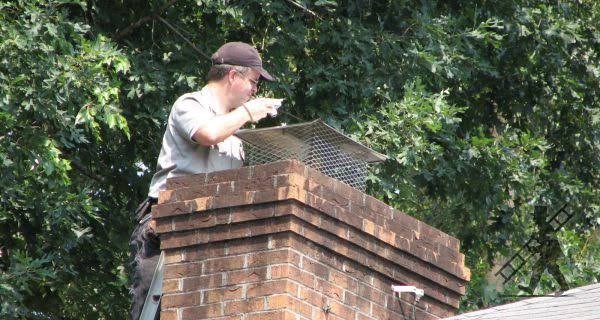
A professional chimney inspection involves much more than a quick visual assessment. Certified inspectors evaluate every accessible part of the chimney system, including the fireplace, chimney flue, liner, chimney cap, chimney crown, flashing, masonry, and venting components. They also look for signs of water damage, structural movement, creosote buildup, animal nests, ventilation problems, and other issues that could affect performance or safety.
For homeowners in areas with frequent rainfall and seasonal temperature changes, regular inspections become even more valuable. Moisture is one of the leading causes of chimney deterioration, making preventive maintenance an important part of protecting your home’s masonry and fireplace system.
In this comprehensive guide, you’ll learn exactly what happens during a chimney inspection, the tools professionals use, the different inspection levels, common defects inspectors uncover, and how regular inspections help extend the life of your chimney.
Table of Contents
- What Is the Chimney Inspection Process?
- Why the Chimney Inspection Process Is Important
- Step 1: Initial Exterior Assessment
- Step 2: Interior Fireplace Inspection
- Step 3: Chimney Flue and Liner Examination
- Step 4: Chimney Cap and Crown Inspection
- Step 5: Masonry and Flashing Evaluation
- Step 6: Smoke Chamber and Draft Testing
- Step 7: Identifying Structural Problems
- Common Issues Found During a Chimney Inspection
- Understanding Level 1, Level 2, and Level 3 Chimney Inspections
- How Long Does a Chimney Inspection Take?
- When Should You Schedule a Chimney Inspection?
- Frequently Asked Questions
- Final Thoughts
What Is the Chimney Inspection Process?
The chimney inspection process is a systematic evaluation of every accessible component of a chimney system to determine its structural integrity, safety, and overall condition. Rather than focusing on a single area, professional inspectors assess how each part of the chimney functions together to ensure smoke, heat, and combustion gases exit the home safely.
A complete chimney inspection examines both visible and concealed areas whenever possible. The objective is not only to identify existing damage but also to detect conditions that may lead to future problems if left unresolved.
During the inspection, a certified professional carefully checks:
- Exterior brick masonry
- Mortar joints
- Chimney crown
- Chimney cap
- Chimney flashing
- Chimney flue
- Chimney liner
- Smoke chamber
- Fireplace firebox
- Damper operation
- Draft performance
- Signs of moisture damage
- Structural movement
- Creosote buildup
- Ventilation issues
- Animal intrusion
Each component serves a specific purpose. Even minor deterioration in one area can affect the entire chimney system, making a thorough inspection essential for long-term performance.
Unlike a basic visual glance from ground level, a professional chimney inspection follows recognized inspection procedures and may involve ladders, moisture meters, mirrors, specialized lighting, cameras, and video scanning equipment to evaluate areas that cannot be seen directly.
The inspection concludes with documented findings and recommendations, allowing homeowners to understand the current condition of their chimney and prioritize any necessary maintenance or repairs.
Why the Chimney Inspection Process Is Important
Many homeowners assume that if smoke exits the chimney properly, everything is working as intended. In reality, numerous chimney issues develop silently over months or even years before becoming visible.
Water infiltration, deteriorating mortar joints, cracked chimney liners, damaged flashing, and gradual structural movement often begin long before homeowners notice any symptoms inside the home.
A comprehensive chimney safety inspection provides an opportunity to detect these issues early while repairs remain relatively straightforward and affordable.
Regular inspections help homeowners:
Improve Fireplace Safety
Hidden defects can increase the risk of chimney fires, smoke backup, or carbon monoxide entering living spaces. Identifying these hazards early significantly improves household safety.
Prevent Expensive Structural Repairs
Small cracks in masonry or deteriorating mortar joints can often be repaired before they require partial rebuilding or complete chimney restoration.
Protect Against Moisture Damage
Rainwater is one of the biggest threats to masonry chimneys. During an inspection, professionals evaluate flashing, chimney caps, crowns, waterproofing, and drainage conditions to reduce future deterioration.
Increase Chimney Lifespan
Routine inspections and timely maintenance slow long-term wear, helping homeowners maximize the lifespan of their brick chimney and fireplace system.
Maintain Efficient Fireplace Performance
A clean, properly functioning flue improves draft performance, allowing smoke and combustion gases to vent efficiently while enhancing overall fireplace operation.
Step 1: Initial Exterior Assessment
Every chimney inspection process begins with a detailed exterior evaluation.
This stage helps inspectors understand the overall structural condition of the chimney before moving to interior components.
Professionals inspect the chimney from multiple angles, often using binoculars, drones, ladders, or elevated platforms depending on roof accessibility.
During this assessment, inspectors examine:
Brick Masonry Condition
Bricks are checked for:
- Surface deterioration
- Spalling
- Cracking
- Loose bricks
- Discoloration
- Moisture staining
- Freeze-thaw damage
Even small cracks can allow water to penetrate deep into the masonry, gradually weakening the chimney’s structural stability.
Mortar Joint Integrity
Mortar naturally deteriorates over time due to weather exposure.
Inspectors carefully examine joints for:
- Missing mortar
- Soft mortar
- Separation
- Gaps
- Erosion
- Loose sections
Damaged mortar joints often indicate the need for tuckpointing before larger structural issues develop.
Chimney Alignment
A leaning chimney may indicate foundation settlement, structural movement, or deteriorated masonry.
Inspectors check:
- Vertical alignment
- Roof connection
- Visible movement
- Separation from exterior walls
- Settlement patterns
Even slight movement deserves further evaluation because it can worsen over time.
Moisture Intrusion
Water damage is one of the most common issues discovered during inspections.
Professionals look for:
- White efflorescence deposits
- Damp brick surfaces
- Mold growth
- Rust stains
- Water streaks
- Vegetation growth
- Damaged waterproofing
These signs often reveal long-term moisture infiltration that may not yet be visible inside the home.
Step 2: Interior Fireplace Inspection
After completing the exterior assessment, inspectors move inside the home to examine the fireplace and connected components.
This portion of the chimney inspection checklist focuses on identifying wear, fire damage, ventilation concerns, and operational issues.
Firebox Inspection
The firebox experiences constant exposure to intense heat.
Inspectors carefully evaluate:
- Firebrick condition
- Cracks
- Loose masonry
- Damaged mortar
- Heat-related deterioration
- Previous repairs
- Overall structural stability
Minor firebox damage can often be repaired before it affects surrounding masonry.
Damper Operation
The damper regulates airflow through the chimney.
Inspectors verify that it:
- Opens smoothly
- Closes completely
- Seals properly
- Shows no excessive corrosion
- Functions without obstruction
A faulty damper can reduce fireplace efficiency and allow unnecessary heat loss throughout the year.
Smoke Chamber Examination
The smoke chamber directs smoke from the fireplace into the chimney flue.
Inspectors assess:
- Surface condition
- Creosote accumulation
- Cracks
- Proper construction
- Smoke flow patterns
- Signs of overheating
Irregularities within the smoke chamber may reduce draft efficiency or contribute to smoke entering the living area.
Early Signs of Creosote Buildup
As part of the fireplace chimney inspection, professionals check for creosote deposits inside accessible areas.
Creosote is a highly combustible substance produced during wood burning. If allowed to accumulate, it significantly increases the risk of chimney fires.
Depending on the level of buildup observed, the inspector may recommend chimney sweeping before the next fireplace season.
By thoroughly inspecting the fireplace interior before evaluating the chimney flue and liner, professionals establish a clear understanding of how efficiently the entire system is operating.
Step 3: Chimney Flue and Liner Examination
One of the most important stages in the chimney inspection process is evaluating the chimney flue and liner. Although these components are hidden from view, they play a critical role in safely venting smoke, heat, and combustion gases out of your home.
The chimney flue is the passageway that carries smoke from the fireplace to the outside, while the chimney liner protects the masonry from excessive heat, corrosive byproducts, and moisture. If either component becomes damaged, the chimney’s ability to operate safely can be compromised.
During a professional chimney inspection, inspectors often use specialized cameras or video scanning equipment to inspect the full length of the flue. This technology allows them to identify hidden issues that cannot be seen during a basic visual inspection.
Professionals carefully look for:
- Cracked or broken chimney liners
- Missing liner sections
- Flue blockages
- Creosote accumulation
- Animal nests or debris
- Water intrusion
- Corrosion in metal liners
- Improper vent sizing
- Loose masonry inside the flue
Even a small crack in the liner can allow heat and combustion gases to reach nearby combustible materials, increasing the risk of fire or carbon monoxide entering the home.
A detailed chimney flue inspection also helps determine whether the chimney is drafting properly and whether additional maintenance or repairs are necessary before continued fireplace use.
Step 4: Chimney Cap and Crown Inspection
Although relatively small components, the chimney cap and chimney crown provide essential protection against weather-related damage.
Because they are constantly exposed to rain, snow, UV rays, and fluctuating temperatures, they often show signs of wear before other chimney components.
Chimney Cap Inspection
The chimney cap sits at the very top of the flue and serves several important purposes.
A certified inspector checks whether the cap is:
- Securely attached
- Rust-free
- Free from damage
- Properly sized
- Allowing adequate airflow
- Effectively preventing animal entry
A damaged or missing cap may allow rainwater, birds, squirrels, leaves, and other debris to enter the chimney, potentially leading to blockages or moisture damage.
Chimney Crown Inspection
The chimney crown is the concrete or masonry surface that covers the top of the chimney structure.
Its purpose is to direct water away from the brick masonry below.
During the inspection, professionals look for:
- Surface cracks
- Separation from the flue
- Missing sections
- Improper slope
- Water pooling
- Signs of freeze-thaw deterioration
Minor crown damage may seem insignificant initially, but repeated exposure to moisture can gradually weaken the entire chimney structure.
Since water is one of the leading causes of masonry deterioration, maintaining the crown is an essential part of long-term chimney maintenance.
Step 5: Chimney Flashing and Masonry Evaluation
Where the chimney meets the roof is one of the most vulnerable areas for water penetration.
This connection is protected by chimney flashing, a system of metal barriers designed to prevent rainwater from entering the home.
During the chimney inspection process, professionals carefully examine the flashing for signs of deterioration.
Common issues include:
- Loose flashing
- Rust
- Sealant failure
- Lifted metal edges
- Corrosion
- Improper installation
- Water stains
Even a small gap can allow moisture to enter the roof system, causing hidden structural damage over time.
The inspector also evaluates the surrounding brick masonry to determine its overall condition.
This includes checking for:
- Loose bricks
- Cracked masonry
- Missing mortar
- Bulging walls
- Spalling bricks
- Efflorescence
- Moisture absorption
- Previous repair quality
Healthy masonry is essential for maintaining the structural integrity of the chimney. Detecting deterioration early allows homeowners to address problems before major rebuilding becomes necessary.
Step 6: Smoke Chamber and Draft Performance Testing
A chimney must do more than simply contain smoke—it must efficiently remove it from the home.
This is why inspectors evaluate the smoke chamber and the chimney’s drafting performance.
The smoke chamber connects the fireplace to the flue and directs smoke upward.
Professionals inspect this area for:
- Cracks
- Rough surfaces
- Excessive creosote
- Improper construction
- Heat damage
- Smoke flow restrictions
After examining the smoke chamber, inspectors evaluate how effectively the chimney drafts.
Proper draft ensures that smoke, gases, and combustion byproducts exit the home quickly.
If draft performance is poor, inspectors investigate possible causes such as:
- Flue blockages
- Improper flue sizing
- Damaged liners
- Negative air pressure
- Creosote buildup
- Obstructions at the chimney cap
Correct draft is essential for maintaining fireplace safety, improving heating efficiency, and reducing the likelihood of smoke entering living spaces.
Step 7: Identifying Structural Problems
Beyond evaluating individual components, inspectors also assess the chimney as a complete structural system.
This stage helps identify issues that may threaten the chimney’s long-term stability.
Common structural concerns include:
Foundation Movement
Settlement beneath the chimney may lead to:
- Leaning structures
- Stair-step cracks
- Wall separation
- Uneven brick courses
Brick Deterioration
Years of weather exposure can weaken masonry through repeated freeze-thaw cycles, moisture penetration, and age-related wear.
Inspectors check for:
- Loose brickwork
- Surface erosion
- Hollow sounds
- Severe cracking
- Brick displacement
Mortar Failure
Mortar naturally deteriorates over time.
Professionals evaluate whether joints require repointing before structural damage spreads.
Water Damage
Moisture remains one of the leading causes of chimney deterioration.
Inspectors identify:
- Damp masonry
- Mold growth
- Efflorescence
- Rust
- Rot around flashing
- Interior staining
Because water damage often progresses slowly, early detection can significantly reduce future repair costs.
Understanding the Three Levels of Chimney Inspections
Not every chimney inspection follows the same procedure. Industry standards recognize three different inspection levels, each designed for specific situations.
Level 1 Chimney Inspection
A Level 1 chimney inspection is the most common type and is recommended when the chimney has been used regularly without any major changes.
This inspection includes a visual examination of all readily accessible components to verify that the chimney is structurally sound and free from obvious hazards.
A Level 1 inspection is generally appropriate as part of an annual chimney inspection for homeowners who use their fireplace under normal conditions.
Level 2 Chimney Inspection
A Level 2 chimney inspection is more comprehensive and includes everything in a Level 1 inspection plus a detailed examination of concealed areas using specialized equipment, such as video scanning cameras.
A Level 2 inspection is often recommended:
- Before buying a home
- After selling a property
- Following a chimney fire
- After severe weather or an earthquake
- When changing the type of fuel used
- After major chimney modifications
This inspection helps uncover hidden defects that may not be visible during a standard visual assessment.
Level 3 Chimney Inspection
A Level 3 chimney inspection is the most extensive evaluation and is only performed when serious hazards or concealed structural issues are suspected.
It may involve removing portions of the chimney or surrounding building materials to gain access to hidden areas.
A Level 3 inspection is generally recommended only when previous inspections indicate significant structural concerns that require further investigation.
Although less common, it provides the most detailed assessment of a chimney’s condition and helps professionals develop an accurate repair plan when major damage is present.
Why Documentation Matters After the Inspection
Once the inspection is complete, homeowners should receive a detailed report outlining the chimney’s overall condition.
A professional report typically includes:
- Inspection findings
- Photographs of problem areas
- Recommended maintenance
- Safety concerns
- Repair priorities
- Preventive maintenance suggestions
This documentation allows homeowners to make informed decisions, budget for future maintenance, and maintain a record of their chimney’s condition over time.
For buyers, sellers, and insurance purposes, a detailed inspection report also provides valuable evidence that the chimney has been professionally evaluated.
Common Problems Found During a Chimney Inspection
Every chimney ages differently depending on its construction, maintenance history, and exposure to weather. While some issues are cosmetic, others can compromise the safety and structural integrity of the entire system. A professional inspection helps uncover these problems before they become major repairs.
Below are some of the most common issues inspectors identify.
Creosote Buildup
Creosote is a dark, tar-like substance that forms when wood burns incompletely. Over time, it accumulates inside the chimney flue and can become highly combustible.
During the inspection, professionals evaluate:
- Thickness of creosote deposits
- Type of buildup
- Areas with restricted airflow
- Fire hazards caused by excessive accumulation
If creosote levels exceed recommended limits, chimney sweeping is typically advised before using the fireplace again.
Cracked or Damaged Chimney Liner
The chimney liner protects surrounding masonry from excessive heat and corrosive combustion gases.
Inspectors commonly find:
- Hairline cracks
- Broken clay tiles
- Corrosion in metal liners
- Missing liner sections
- Separation between joints
Even minor liner damage should not be ignored because it can reduce the chimney’s ability to vent safely.
Water Intrusion
Water is one of the leading causes of chimney deterioration.
Signs include:
- Damp brickwork
- Interior water stains
- Mold or mildew
- Rusted metal components
- White mineral deposits (efflorescence)
- Freeze-thaw damage
Most moisture problems originate from damaged chimney caps, cracked crowns, deteriorated flashing, or worn masonry joints.
Masonry Deterioration
Brick and mortar naturally wear over time, especially in climates with frequent rainfall and seasonal temperature changes.
Inspectors often discover:
- Missing mortar joints
- Loose bricks
- Spalling brick surfaces
- Bulging masonry
- Structural cracking
Early masonry repairs are typically much less expensive than rebuilding large sections of the chimney.
Animal or Bird Nests
Unprotected chimneys often become nesting areas for birds, squirrels, raccoons, and other wildlife.
These blockages can:
- Restrict airflow
- Prevent proper draft
- Introduce unpleasant odors
- Increase fire risks
- Damage chimney liners
Installing or repairing a quality chimney cap usually prevents future animal intrusion.
How Long Does a Chimney Inspection Take?
One of the most common questions homeowners ask is how much time they should expect to set aside for an inspection.
The answer depends on several factors, including:
- Chimney height
- Roof accessibility
- Overall condition
- Inspection level
- Presence of damage
- Whether specialized camera equipment is required
In most situations:
| Inspection Type | Typical Duration |
| Level 1 Inspection | 45–60 minutes |
| Level 2 Inspection | 1–2 hours |
| Level 3 Inspection | Varies depending on investigation |
If significant defects are discovered, additional time may be needed to document findings, capture photographs, or recommend appropriate repairs.
When Should You Schedule a Chimney Inspection?
Regular inspections help prevent unexpected problems, but timing also matters.
Experts generally recommend scheduling an inspection:
Before Winter
Before fireplace season begins, an inspection helps ensure the chimney is clean, structurally sound, and ready for regular use.
After Severe Storms
High winds, heavy rainfall, falling branches, or seismic activity can damage chimneys without creating immediately visible signs.
Scheduling an inspection after major weather events helps identify hidden structural concerns.
Before Buying or Selling a Home
A chimney inspection provides buyers and sellers with valuable information about the condition of the fireplace system.
Many home transactions include a Level 2 inspection to identify concealed defects.
After a Chimney Fire
Even if visible damage appears minimal, intense heat can weaken liners, masonry, and structural components.
A professional evaluation should always follow any chimney fire.
If You Notice Warning Signs
Schedule an inspection promptly if you observe:
- Smoke entering your home
- Water leaks around the fireplace
- Cracked bricks
- Loose mortar
- Strong odors
- White staining
- Rusted fireplace components
- Pieces of tile or masonry inside the firebox
Addressing these issues early can prevent more extensive damage.
Benefits of Regular Chimney Inspections
Routine inspections are an investment in your home’s long-term safety and value.
Some of the biggest benefits include:
Improved Fireplace Safety
Regular inspections help reduce the risk of chimney fires, smoke backup, and carbon monoxide exposure.
Lower Repair Costs
Minor issues discovered early are usually much easier—and less expensive—to repair than extensive structural damage.
Longer Chimney Lifespan
Preventive maintenance protects brick masonry, mortar joints, flashing, and chimney liners from premature deterioration.
Better Heating Efficiency
A clean, unobstructed chimney drafts more efficiently, improving fireplace performance while reducing smoke problems.
Increased Property Value
Well-maintained fireplaces and chimneys are attractive features for prospective buyers and demonstrate responsible home maintenance.
Why Routine Chimney Inspections Are Especially Important for Vancouver Homes
Homes throughout Vancouver experience environmental conditions that can accelerate chimney wear.
Frequent rainfall, moisture exposure, seasonal temperature fluctuations, and long wet winters create ideal conditions for masonry deterioration if maintenance is neglected.
Water can gradually penetrate small cracks in brickwork or mortar joints. During colder periods, repeated expansion and contraction may enlarge those cracks, eventually affecting the chimney’s structural stability.
For this reason, many homeowners choose to schedule a professional inspection before the heating season begins. Regular evaluations help identify developing issues before they require extensive repairs.
If you’re looking for a more detailed assessment specific to local weather conditions, our Chimney Inspection Vancouver service provides comprehensive inspections tailored to homes throughout the Lower Mainland. (Insert your internal link here.)
Routine inspections combined with timely maintenance can significantly extend the lifespan of your chimney while helping you avoid unexpected repair costs.
Frequently Asked Questions
What is the chimney inspection process?
The chimney inspection process is a systematic evaluation of the chimney’s structural condition, fireplace, flue, liner, chimney cap, crown, flashing, and masonry to identify safety hazards, moisture damage, and maintenance needs.
What does a chimney inspection include?
A professional inspection typically includes examining:
- Fireplace
- Firebox
- Damper
- Smoke chamber
- Chimney flue
- Chimney liner
- Chimney cap
- Chimney crown
- Flashing
- Exterior masonry
- Draft performance
- Visible structural damage
How often should a chimney be inspected?
Industry professionals generally recommend having your chimney inspected at least once a year, even if the fireplace is used only occasionally.
Annual inspections help identify developing problems before they become costly repairs.
How long does a chimney inspection take?
Most standard inspections take between 45 minutes and two hours, depending on the inspection level, chimney condition, and accessibility.
Why are chimney inspections important?
They improve fireplace safety, identify hidden structural problems, reduce long-term repair costs, and help maintain efficient chimney performance.
What are the different levels of chimney inspection?
There are three inspection levels:
- Level 1 — Routine annual inspection.
- Level 2 — More comprehensive inspection using specialized equipment.
- Level 3 — Detailed investigation involving concealed areas when significant damage is suspected.
Can a chimney inspection detect leaks?
Yes. Inspectors evaluate the chimney crown, flashing, masonry, chimney cap, mortar joints, and other components to determine whether water intrusion is occurring.
When should I schedule a chimney inspection?
It’s best to schedule an inspection before winter, after severe storms, before purchasing a home, after a chimney fire, or whenever warning signs appear.
Do I need a chimney inspection every year?
Yes. Annual inspections help maintain safe operation, identify hidden deterioration, and reduce the likelihood of major structural repairs.
What problems can a chimney inspection identify?
A professional inspection may uncover:
- Creosote buildup
- Cracked liners
- Damaged masonry
- Water intrusion
- Loose bricks
- Draft problems
- Flashing failures
- Chimney cap damage
- Structural movement
- Animal blockages
Final Thoughts
Understanding the chimney inspection process gives homeowners a clearer picture of what professionals evaluate and why regular inspections are an essential part of responsible home maintenance.
From the initial exterior assessment to the examination of the chimney flue, liner, masonry, chimney cap, flashing, and draft performance, every step is designed to identify hidden problems before they become expensive repairs or safety hazards.
Routine inspections not only improve fireplace performance but also help protect your home’s structural integrity, reduce long-term maintenance costs, and provide greater peace of mind throughout the year.
If your chimney hasn’t been professionally evaluated recently—or if you’ve noticed signs such as water leaks, deteriorating masonry, smoke problems, or visible cracks—it’s wise to arrange a thorough inspection before the damage progresses.
For homeowners in the Lower Mainland, professional Chimney Inspection Vancouver services can provide a detailed assessment tailored to local weather conditions, helping ensure your chimney remains safe, efficient, and ready for every heating season. (Insert your internal link here.)